How To Print Shirts With 3D Puff HTV
Summary:
– 3D puff HTV expands during heat pressing to produce a dimensional and textured finish.
– Proper temperature, pressure, and fabric selection are essential for consistent adhesion and expansion.
– The technique is widely used in DIY and custom apparel projects to add visual depth and impact.
Comprehensive Guide To Printing A Shirt With 3D Puff Heat Transfer Vinyl (HTV)
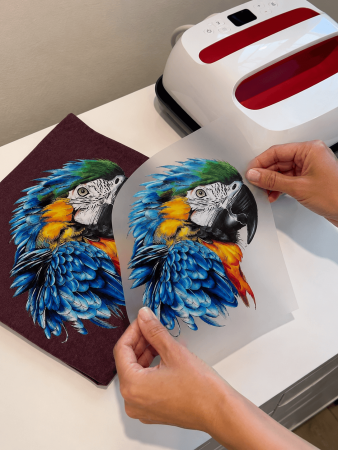
3D puff heat transfer vinyl (HTV) can create a striking, raised effect on your designs, making them stand out with a unique texture. This guide will walk you through the process step-by-step and provide recommendations for the best blank t-shirts to use with 3D puff HTV. Here’s how to print shirts with 3D puff HTV.
Materials Needed: How To Print Shirts With 3D Puff HTV
- 3D Puff Heat Transfer Vinyl (HTV)
- Cutting machine (e.g., Cricut, Silhouette)
- Weeding tools (tweezers, hooks, etc.)
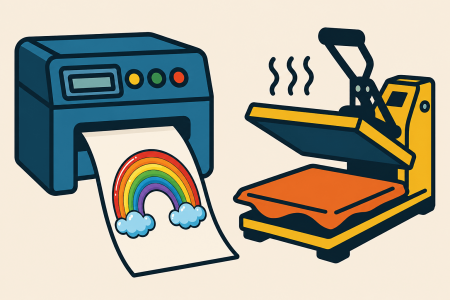
- Heat press or iron
- Blank t-shirt or other blank apparel item
- Parchment paper or Teflon sheet
- Ruler or measuring tape
Recommended T-Shirts For 3D Puff HTV:
When choosing a wholesale t-shirt for 3D puff HTV, consider the fabric type and weight. Here are some excellent options:
- 100% Cotton T-Shirts:
- Gildan 5000 Heavy Cotton T-Shirt: Durable and budget-friendly, ideal for beginners.
- Bella+Canvas 3001 Unisex Jersey T-Shirt: Soft and comfortable, great for a premium feel.
- Cotton/Polyester Blend Tees:
- Next Level 6210 CVC Crew T-Shirt: A perfect blend of cotton and polyester, offering durability and softness.
- Hanes 5280 ComfortSoft T-Shirt: Comfortable and easy to work with, making it a versatile choice.
- 100% Polyester T-Shirts:
- Augusta Sportswear 790 Adult Wicking T-Shirt: Excellent for wholesale athletic wear, with moisture-wicking properties.
Step-by-Step Process: How To Print Shirts With 3D Puff HTV
- Design Your Artwork:
- Use design software compatible with your cutting machine (e.g., Cricut Design Space, Silhouette Studio). Create or select a design suitable for 3D puff HTV, preferably simple and bold.
- Mirror Your Design:
- Mirror your design in the software to ensure it appears correctly on the t-shirt after transfer. This step is crucial as the vinyl is applied upside down.
- Cut the Vinyl:
- Load the 3D puff HTV into your cutting machine with the shiny side down.
- Adjust the cut settings according to the vinyl manufacturer’s guidelines. Typically, 3D puff HTV requires a deeper cut due to its thickness.
- Weed the Design:
- Once cut, remove the excess vinyl from around your design using weeding tools. Be careful not to pull away any parts of the design itself.
- Prepare the Shirt:
- Preheat your heat press or iron to the temperature recommended by the vinyl manufacturer. This is usually around 320°F (160°C), but always check specific instructions.
- Lay your blank wholesale shirt on a flat surface and preheat the area where you’ll apply the vinyl for 5-10 seconds to remove moisture and wrinkles.
- Position the Vinyl:
- Place your weeded vinyl design on the shirt with the sticky side down. Use a ruler or measuring tape to ensure the design is centered and aligned.
- Cover with Parchment Paper or Teflon Sheet:
- Protect the vinyl by covering it with a piece of parchment paper or a Teflon sheet before applying heat.
- Heat Press the Design:
- Apply the heat press or iron with medium pressure for the time recommended by the vinyl manufacturer, usually around 10-15 seconds.
- If using an iron, press firmly and avoid moving it around to ensure even pressure.
- Peel the Carrier Sheet:
- Carefully peel the carrier sheet away while it’s warm, or as per the manufacturer’s instructions. The 3D puff effect should be visible now, with the design raised above the shirt surface.
- Post-Press (Optional):
- For extra durability, cover the design again with parchment paper or a Teflon sheet and press for another 5-10 seconds. This helps to secure the edges and enhance the puff effect.
Check out this video tutorial from Hustle Ninjas!
Tips for Success:
- Test Cuts: Always perform a test cut on a small piece of vinyl to ensure your settings are correct.
- Even Pressure: Ensure even pressure and consistent temperature during the pressing process to achieve a uniform puff effect.
- Follow Manufacturer’s Instructions: Different brands of 3D puff HTV might have specific requirements, so always follow the guidelines provided by the manufacturer for the best results.
- Care Instructions: After applying 3D puff HTV, advise washing the garment inside out in cold water and avoiding high heat in the dryer to preserve the design.
By following these detailed steps and choosing the right t-shirt, you can create stunning, professional-quality designs with 3D puff HTV. Enjoy crafting your unique, textured custom apparel! We hope this helped you learn how to print shirts with 3D puff HTV.
Can Shirt Printing Be A Good Side Job?
Don’t forget to shop out Independence Day Sale!
FAQ
What is 3D puff HTV?
3D puff HTV is a type of heat transfer vinyl that expands when exposed to heat, creating a raised and textured design on fabric. Unlike standard HTV, puff vinyl produces a dimensional effect that adds depth and visual impact to printed graphics.
How does 3D puff heat transfer vinyl work?
3D puff heat transfer vinyl works by reacting to heat during the pressing process, which causes the material to expand and form a soft, elevated surface. Proper temperature, pressure, and pressing time are essential to achieve consistent expansion and adhesion.
What fabrics work best for 3D puff HTV?
Cotton and cotton polyester blends work best for 3D puff HTV because they provide stable surfaces for adhesion and heat application. Smooth fabrics help ensure clean expansion and minimize uneven texture during the pressing process.
How durable is 3D puff HTV after washing?
3D puff HTV can remain durable when garments are washed inside out in cold water and dried on low heat. Proper pressing and curing during application help maintain adhesion and preserve the raised design over repeated washes.
Can 3D puff HTV be layered with other vinyl?
3D puff HTV can be layered, but it is generally recommended as the top layer to preserve its raised texture. Placing additional vinyl on top may compress the puff effect and reduce the dimensional appearance.