Hood Placement Tips for Back Print Perfection
How Do I Handle Hood Placement When Printing the Back?
Custom hoodie printing is both an art and a science. While front prints and sleeve designs have their challenges, one of the most technically demanding areas to work with is the back of a blank hoodie, especially when factoring in the placement and presence of the hood itself. Unlike blank t-shirts or crewnecks, basic hoodies introduce a three-dimensional obstruction that dramatically affects how your design looks when worn.
Summary:
– Practical guidance on hood placement strategies for achieving crisp, centered back prints on sweatshirts and hoodies, including aligning artwork with garment seams and considering fabric stretch.
– It highlights how understanding hoodie anatomy, print vector placement zones, and garment measurements helps decorators avoid common issues like off-center graphics or distortion when printing on hooded apparel.
– These tips support wholesale decorators and custom apparel businesses in planning accurate print layouts, reducing waste, and improving consistency across bulk orders for branded hoodies and personalized designs.

How Do I Handle Hood Placement When Printing the Back?
Custom hoodie printing is both an art and a science. While front prints and sleeve designs have their challenges, one of the most technically demanding areas to work with is the back of a blank hoodie, especially when factoring in the hood placement. Unlike blank t-shirts or crewnecks, basic hoodies introduce a three-dimensional obstruction that dramatically affects how your design looks when worn.
For printers, designers, and apparel entrepreneurs, hood placement matters. The way a hood falls or hangs impacts the visibility and centering of the back design. Misalignment, unintentional coverage, and skewed prints can all compromise the final result and customer satisfaction.
So how do professionals manage this hurdle? Understanding the technical aspects of hoodie construction, adjusting print locations accordingly, and working with quality blanks like those from BulkApparel all contribute to solving this challenge. Let’s cover everything from design planning and positioning to production techniques and testing to help you achieve back print perfection every time.
Understanding Hoodie Structure and How It Affects Back Printing
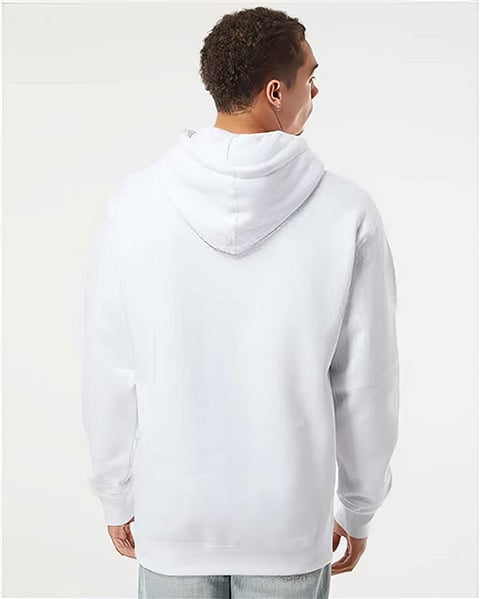
To start, it’s essential to understand the anatomy of a bulk hoodie. Unlike flat-backed garments, a wholesale hoodie includes a bulky, often double-layered hood that sits at the upper portion of the back panel. When lowered, this hood can drape over a significant portion of the back, particularly the top-center area where many designs are typically placed.
This causes several issues:
- Part of the print may be hidden when the hood is down
- If printing too high, the design may appear off-center or get creased
- The vertical position might look uneven when worn due to the added bulk of the hood
Because of these complications, printers must rethink standard placements. That starts with shifting away from default back-centered placements and making calculated adjustments for visibility, readability, and visual balance.
Evaluating Garment Fit and Hood Drop Before Printing
Before sending a job to production, it’s critical to evaluate how the hoodie wholesale sits on the body and how far the hood drops. Not all bulk order hoodies are created equal. Factors that influence hood behavior include fabric weight, seam location, neckline depth, and hood construction.
A heavyweight fleece hoodie may feature a thicker, stiffer hood that holds its shape, while a lightweight fashion hoodie may have a soft, collapsing hood that hangs differently. Each type of garment changes how much space is covered or exposed on the back. When choosing your wholesale blank hoodie, try it on or put it on a mannequin to observe the hood’s position at rest. This will give you an accurate understanding of where your back design will show when the hoodie is worn naturally.
Use a center-back seam, if available, to gauge alignment. For hoodies without center seams, rely on side seam measurements and flat garment inspection to determine the best visual placement.
How to Adjust Design Placement for Optimal Visibility
Once you know how the hood falls, shift your artwork down accordingly. For example, a graphic that would normally be placed two inches below the collar on a basic t-shirt may need to start at five or six inches below the neckline on a hoodie to avoid the hood’s coverage.
This adjustment depends on the hoodie style and the size of the graphic. Smaller designs like logos or emblems may need to move significantly lower. Larger designs that span the upper and mid-back can often be resized or repositioned to maintain visibility and impact.
This is where working with screen printing templates designed specifically for hoodies becomes useful. These templates account for hood placement and give you print-safe zones. Templates also allow you to preview how your design will interact with the hood’s drape, ensuring nothing important gets obscured.
Keep in mind that what looks balanced on a flat table may not look right when worn. A print that appears too low on a flat garment can actually look perfect once the hoodie is worn and the hood rests on the upper shoulders.
Centering Graphics When the Hood Obstructs Visual Lines

Another major challenge involves keeping your print centered. Since the hood’s bulk distorts the top of the back, traditional centering techniques, like measuring from the collar, can lead to misalignment. Instead, use side seam alignment or flat-lay body centering from armpit to armpit.
By measuring the horizontal midpoint between seams and placing the design relative to the mid-back rather than the collar, you ensure the graphic appears centered to the viewer rather than the hanger. This is crucial when printing on garments that will be seen on bodies, not just hangers or shelves.
Be especially cautious when working with multi-color graphics or symmetrical designs. Misalignment becomes more obvious with these types of prints. Use positioning guides, ghost rulers, or laser centering tools to keep everything aligned.
Choosing the Right Hoodie Material for Easier Placement
Some hoodie materials lend themselves better to back printing than others. For example, ringspun cotton hoodies tend to offer smoother surfaces and less bulky seams, which aid in precision alignment and print clarity.
Using ringspun cotton gives you a tighter weave, better ink laydown, and a more polished result. The surface reacts better to most printing techniques, whether screen printing, heat transfer, or DTG. It also reduces inconsistencies that occur with open-end cotton garments, especially when pressure is applied during curing or pressing.
This makes ringspun cotton a go-to choice for printers aiming to create professional-grade custom hoodies. Several options available through distributors like Bulk Apparel provide blank hoodies made from high-quality blank activewear, allowing you to maintain quality across large print runs.
Design Size and Complexity Considerations
Bigger is not always better. A design that spans the entire back can look distorted if the hood hangs too low. The weight and fall of the hood can interfere with top-level detailing, especially in typography or intricate artwork.
Simplify when possible. A bold graphic with clear visual elements will outperform complex, detail-heavy designs in obstructed zones. Avoid placing small fonts or thin lines near the top of the back panel. These are the most likely to get covered or warped by the hood.
If your client insists on a specific layout, make sure they understand how the hood may alter the final look. Provide mockups, wear tests, or actual samples so there are no surprises post-production.
Screen Printing Setup Techniques for Hooded Garments
Your printing setup must also accommodate hoodie construction. Use a hoodie platen if available. These specialty platens are slightly contoured or shortened to accommodate the front pocket and seams. A regular t-shirt platen may not allow the back to lay fully flat due to the hood’s bulk.
Tape down the hood during printing to keep it from interfering with the press head. Some printers even use clamps or heat-resistant adhesives to secure the hood out of the way. This prevents shadowing or shifting that could misalign the print.
For flash-curing between layers, keep the hoodie flat to avoid puckering. If needed, lower the flash intensity or increase dwell time to account for thicker materials.
Finally, monitor for hoodie shrinkage. Pre-shrunk garments reduce post-print warping, but heavier hoodies may still shift slightly after their first wash. If print placement is tight near the hood, this could create visual imbalance. Test wash samples to confirm placement accuracy over time.
Testing for Wear Visibility and Positioning
Before committing to a large run, always print and test a sample garment. Wear it or place it on a mannequin to observe hood position, print alignment, and visual flow. Move naturally to see how the graphic behaves during normal activity. Is it still visible? Does the hood fall in a way that distorts the print? Would slight adjustments improve the outcome?
This real-world testing is the final and most important stage before mass production. No amount of digital mockups can replace the value of physically seeing the design on an actual hoodie.
If you’re working with a client or team, use this sample for final approval. They may realize that their original design needs tweaking once they see how the hood placement affects the visual impact.
Using Bulk Sourcing for Consistency in Production

Hood placement printing requires consistency across garments. Minor differences in hoodie styles can lead to major variances in print results. That’s why sourcing consistent, high-quality blank apparel from a trusted hoodie wholesaler is essential.
Ordering through a hoodie supplier like BulkApparel ensures you get access to reliable inventory of matching hoodie styles, sizes, and materials. This reduces variability and eliminates guesswork in hood drop, back panel measurements, and overall construction. Whether you’re printing blank t-shirts, pullovers, or full-zip hoodies, consistency drives quality.
When working on larger orders, consider reserving batches of hoodies from the same dye lot. Even slight variations in fabric weight or seam tolerance can shift the print area enough to affect alignment.
Tips for Hoodie-Friendly Design That Works Around the Hood Placement
Rather than fight the hood, many designers choose to work around it. Here are some creative approaches:
- Drop the graphic lower on the back for intentional placement
- Use oversized designs that start below the hood and travel down
- Add front and sleeve prints to compensate for reduced back visibility
- Consider wraparound graphics or side-panel prints for added dimension
By designing with the hood placement in mind, you enhance the wearability and impact of the garment. This results in a better product, happier customers, and a stronger brand reputation.
Back Design Review
Hoodie printing is a rewarding but challenging endeavor. Hood placement on the back affects everything from print visibility and placement to alignment and wearability. By understanding garment anatomy, adjusting your layout, choosing appropriate materials like ringspun cotton, and conducting thorough testing, you can consistently produce high-quality results.
Whether you’re launching a streetwear brand, fulfilling bulk orders for schools, or designing your next collection, mastering hood placement is key to creating custom hoodies that look great and perform well.
For printers looking to source consistent, high-performance hoodies, BulkApparel offers a comprehensive selection of blank apparel perfect for back printing. Invest in quality and attention to detail, and your hoodie prints will stand out for all the right reasons.
Best Print Placements For Hoodies
FAQ
What are custom hoodies and why choose them?
Custom hoodies are hooded sweatshirts designed with personalized graphics, logos, or text, making them ideal for branding, teams, events, or creative projects. For the best printing results, hoodies made from cotton or cotton-poly blends are recommended because they provide a smooth surface, strong ink adhesion, and long-lasting durability.
How to make custom hoodies?
To make custom hoodies, start by choosing a blank hoodie made from print-friendly fabrics like cotton or cotton-poly blends, then create or select your design. Next, apply the design using methods such as screen printing, embroidery, DTF, or heat transfer, and order in bulk from a hoodie wholesale supplier to reduce costs and ensure consistent results.
What is the design area on the back of a hoodie?
The design area on the back of a hoodie refers to the large, flat section on the rear of the garment that is commonly used for logos, text, or graphics. This space allows for bigger, more visible designs and is ideal for back prints in custom hoodie projects.
Why is a hoodie design placement guide important for printers?
A hoodie design placement guide ensures that graphics are placed consistently across a bulk order, helping printers avoid misaligned prints and maintain professional results on every sweatshirt.
Where to buy high quality blank hoodie?
You can buy a high-quality blank hoodie from trusted wholesale apparel suppliers like BulkApparel, which offers a variety of durable, print-ready hoodies from reputable brands with consistent sizing and competitive bulk pricing. Shopping online with BulkApparel makes it easy to filter by style, size, and fabric so you can choose hoodies that suit customization, team apparel, or resale needs.