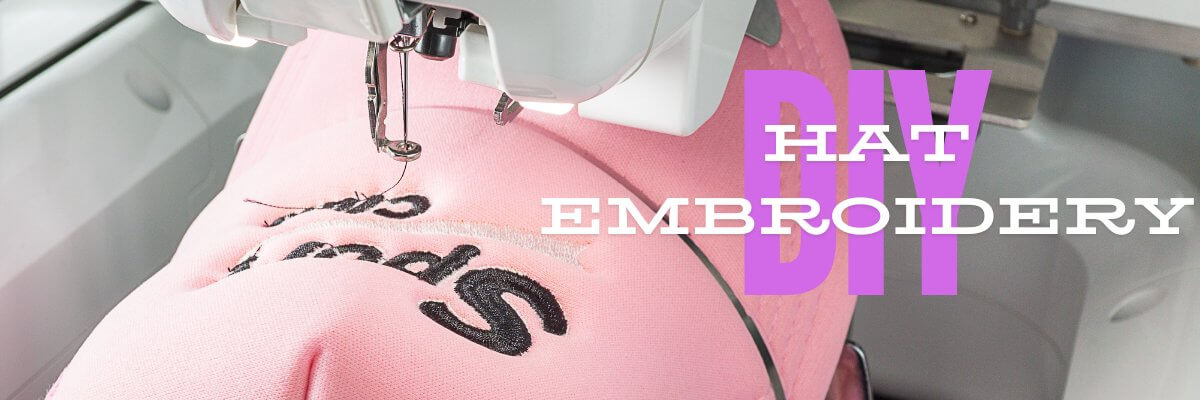
DIY Embroidery On Hats: A Detailed Guide
Here’s a comprehensive guide on DIY embroidery on hats, including detailed steps, specific material recommendations, and detailed wholesale blank hat recommendations for yourself or your custom apparel brand.
Summary:
– Structured hats made from cotton or polyester blends provide stable surfaces for embroidery.
– Proper use of stabilizer and hoop placement prevents puckering and maintains design alignment.
– DIY embroidered caps are widely used for branding, team apparel, and personalized fashion merchandise.
Here’s a comprehensive guide on DIY embroidery on hats, including detailed steps, specific material recommendations, and detailed wholesale blank hat recommendations for yourself or your custom apparel brand.
DIY Embroidery On Hats: A Detailed Guide
Steps For DIY Embroidery On Hats
1. Choose Your Blank Hat
- Select a blank cap that suits your embroidery project. Ensure the material is suitable for DIY embroidery on hats (e.g., cotton, polyester, wool).
Wholesale Hat Recommendations: – Richardson 112 Trucker Hat: Classic design with a structured front and mesh back. – Yupoong 6089M Classic Snapback: High-profile, structured cap perfect for flat embroidery. – Flexfit Cap 6277 Cotton Blend: Mid-profile, structured cap with stretch fit.
2. Gather Materials for DIY Embroidery on Hats
- Embroidery Machine: Choose a machine that can handle hats, like the Brother PR1055X or Ricoma EM-1010.
- Embroidery Thread: High-quality polyester or rayon threads.
- Embroidery Stabilizer: Choose between tear-away or cut-away stabilizers.
- Embroidery Needles: Use size 75/11 or 80/12 needles.
- Hoop: A hat-specific hoop like the Brother PRH100 or a standard embroidery hoop.
- Embroidery Scissors: Sharp, small scissors for trimming threads.
- Transfer Paper or Water-Soluble Pen: For transferring your design onto the hat.
3. Prepare the Hat
- Mark the Center: Using a water-soluble pen or chalk, mark the center of your design on the hat wholesale. This ensures precise placement.
- Insert the Stabilizer: Place a piece of stabilizer inside the hat, behind the area to be embroidered. This provides support for the stitches and prevents puckering.
- Hoop the Hat: Secure the hat in the embroidery hoop. If using a standard hoop, you may need to roll the edges of the hat to fit it properly. A hat-specific hoop can make this process easier and more secure.
4. Transfer the Design
- Design Transfer: Transfer your design onto the customizable hat using transfer paper or a water-soluble pen. Ensure the design is centered and correctly positioned on the hat.
5. Set Up the Embroidery Machine
- Thread the Machine: Load your embroidery machine with the chosen thread color.
- Load the Design: Upload your embroidery design to the machine. Make sure it fits within the embroidery area of the hat.
- Position the Hat: Place the hooped hat into the embroidery machine. Ensure the design is aligned properly with the marked center.
6. Embroidery Process
- Start the Machine: Begin the embroidery process, carefully monitoring the progress.
- Adjustments: Pause the machine if any adjustments are needed to ensure the design is stitching correctly.
- Complete the Design: Once the design is complete, carefully remove the hat from the hoop.
7. Finishing Touches
- Trim Loose Threads: Use embroidery scissors to trim any loose threads.
- Remove the Stabilizer: Carefully tear away or cut the stabilizer from the inside of the hat.
- Final Pressing: Lightly press the hat if necessary, using a pressing cloth to avoid direct heat on the embroidery.
Embroidery Material Recommendations
1. Thread
- Madeira Polyneon: Durable and vibrant polyester thread, ideal for outdoor wear.
- Robison-Anton Rayon: Smooth and shiny rayon thread, perfect for detailed designs and a luxurious finish.
2. Stabilizer
- Pellon 551 Stick-N-Tear: A tear-away stabilizer that is easy to remove after custom embroidery.
- Sulky Cut-Away Plus: Provides strong support for more intricate and detailed designs, especially on stretchy fabrics.
3. Needles
- Schmetz Embroidery Needles: High-quality needles available in various sizes, ensuring smooth stitching.
4. Hoops
- Brother PRH100: A hat-specific hoop compatible with Brother embroidery machines.
- Janome Hat Hoop: Specifically designed for Janome machines, ensuring a snug fit for hats.
5. Transfer Tools
- Sulky Iron-On Transfer Pen: Allows for easy and precise transfer of designs onto fabric.
- Dritz Water Soluble Marking Pen: Temporary markings that can be washed away after embroidery.
Detailed Wholesale Hat Recommendations from BulkApparel.com

- Features: Classic trucker hat with a structured front and breathable mesh back. Snapback closure for adjustable fit.
- Material: 60/40 cotton/polyester front, 100% polyester mesh back.
- Ideal For: Custom embroidery, promotional items, and casual wear.
2. Yupoong 6089M Classic Snapback

- Features: High-profile, structured cap with a flat bill. Snapback closure for adjustable sizing.
- Material: 80/20 acrylic/wool blend.
- Ideal For: Detailed embroidery designs, fashion-forward styles.
3. Flexfit Cap 6277 Cotton Blend

- Features: Mid-profile, structured cap with a stretch fit. Comfortable and durable.
- Material: 63/34/3 polyester/cotton/spandex.
- Ideal For: Comfortable daily wear, athletic events, and custom branding.
Final Tips: DIY Embroidery On Hats
- Practice First: Before starting on your final project, practice your design on a spare hat or piece of fabric to ensure everything is set up correctly.
- Adjust Machine Settings: Make sure to adjust the settings on your embroidery machine according to the hat’s material and thickness.
- Be Patient: Take your time during the embroidery process to ensure the best results.
- Clean Work Area: Keep your work area clean and organized to avoid mistakes and make the process more enjoyable.
With these detailed steps, materials, and hat recommendations, you are well-equipped to create beautiful and professional-looking embroidered hats! Enjoy your DIY embroidery on hats project!
FAQ
What is DIY embroidery on hats?
DIY embroidery on hats is the process of stitching custom designs, logos, or lettering onto caps using either hand embroidery tools or embroidery machines. This method allows individuals and small businesses to personalize blank hats for fashion, branding, or promotional purposes.
What tools do you need to embroider a hat at home?
Embroidery on hats requires basic tools such as embroidery thread, needles, stabilizer backing, and either a hand hoop or an embroidery machine compatible with caps. A cap hoop attachment is often necessary for machine embroidery to secure curved hat panels during stitching.
Can you embroider on any type of hat?
Embroidery works best on structured hats made from cotton twill, canvas, or polyester blends. Thicker front panels provide stability for stitching, while very thin or stretchy materials may require additional stabilizer to prevent puckering or distortion.
Is machine embroidery better than hand embroidery for hats?
Machine embroidery is generally more efficient and consistent for hats, especially for detailed logos or bulk production. Hand embroidery offers creative flexibility but requires more time and skill to achieve uniform results on curved surfaces.
Can embroidered hats be washed safely?
Embroidered hats can be washed safely when cleaned gently by hand or on delicate cycles with cold water. Air drying is recommended to preserve thread integrity and maintain the shape of structured caps after embroidery.